Month: February 2012

Moussaka

If, like me, you thought moussaka was a Greek dish, you were wrong. It originated in Rumania, but is widely cooked in Greece and Turkey. So there is your piece of trivia for today!

Just a word about cooking aubergine, or eggplant. I had been brainwashed by cookery books to do one of two things to aubergine before cooking: either slice it and soak it in milk for an hour to remove any bitterness, or sprinkle it with salt, leave for an hour, then wash. I do not like the salt method, as no matter how much you wash the aubergine, it still tastes salty. Turkey, (where almost everything contains aubergine), was an eye opener. They do absolutely nothing to their aubergine, except wait until the very last minute to peel and slice them. Since I went to Turkey, I have not soaked an aubergine in milk, nor have I salted one, and the results have shown such precautions to be absolutely unnecessary. Don’t peel and slice the aubergine until you are ready to use it. To cater to tradition, I have included the usual instructions in the recipe. If you trust me, forget them.

Moussaka is a combination dish of layers of cooked lamb mince and aubergine topped with a white sauce flavoured with Parmesan cheese. Do not be tempted to use beef mince. The combination of lamb and aubergine was made in heaven, and beef does not come even close.

Meat Sauce:

1 kg lamb mince
1 large onion, chopped
2 cloves garlic, crushed
Oil for cooking
1 cup chopped, peeled tomatoes, or equivalent amount of Italian tomato sauce
2 tablespoons tomato paste
½ cup white wine
2 tablespoons chopped parsley
1 teaspoon brown sugar
¼ teaspoon cinnamon
Salt and freshly ground pepper

2 large aubergine or several small ones
Oil for grilling

Sauté the onion and garlic in oil if a heavy based frying pan until transparent. Remove from pan and set aside. Increase the heat and brown the lamb mince, stirring well. Return the onions to the pan and add the tomatoes, tomato paste, wine, brown sugar and cinnamon. Season to taste. Cover and simmer gently for 30 minutes. If you feel the meat needs thickening, make a roux of flour and butter, add some of the liquid to the roux, stir well, ensuring that there are no lumps, then add to the sauce. Stir in the chopped parsley last.

Peel the aubergines and slice into 5mm slices. Sit them in a shallow dish containing milk for about half an hour. Drain off milk, wash aubergine well and dry with paper towels.
Spray a baking dish with oil, add a layer of aubergine and spray with oil. Place the aubergine under a hot grill, and lightly brown. Turn and repeat on the other side. Repeat with the remaining aubergine. Alternatively, the aubergine may be shallow fried in oil, but they will absorb a lot of unnecessary oil this way.

Grease an oven dish (approx. 33cm by 23cm by 5cm) and place a layer of aubergine slices in the base. Top with half the meat mixture. Add another layer of aubergine, then the remainder of the meat. Finish with a layer of aubergine.

Cream Sauce:

3 tablespoons butter
4 tablespoons flour
2 cups milk
Freshly grated nutmeg
½ cup grated Parmesan cheese (more if you like a very cheesy sauce)
1 egg, lightly beaten
Salt and freshly ground pepper

Make a thick white sauce using the butter, flour and milk. Add the grated nutmeg and half the grated Parmesan. Stir the beaten egg into the sauce.

Spread the sauce over the top layer of aubergine. Sprinkle with the remaining Parmesan cheese.

Preheat oven to 180C and bake mousska for 1 hour. Let stand for 10 minutes before cutting it into squares and serving.

Gretta Anna’s cheesecake

If Gretta Anna can be believed, this recipe started the whole cheesecake rage in every coffee shop and bistro in Australia. Whether that is true or not, it is very reliable and still produces moans of appreciation.

225g plus 5 extra plain sweet biscuits (Arnotts Sweet Arrowroot)
4 tablespoons unsalted butter, melted

600g Philadelphia Cream Cheese (not the light variety)
1 cup sugar
2 eggs
1 tablespoon lemon juice
1 teaspoon vanilla essence
Whipped cream to garnish
Nutmeg, freshly grated to garnish

Lightly grease a 25cm spring-form pan. Crunch the biscuits well by putting them between two sheets of cling foil or baking paper and rolling them with a rolling pin. They should be well crumbled, but not powder. The consistency of cornflake crumbs is perfect. If preparing crumbs in a food process be careful not to over-process.

Mix the biscuit crumbs with the melted butter and line the base and sides of the spring-form pan with the mixture, making sure that you do not get too much of a build-up of biscuit crumbs where the base meets the sides. Refrigerate until needed.

Cream together the Philadelphia cream cheese and the sugar, but don’t over-beat. Add the eggs, one at a time, very gently, so as to let as little air into the mixture as possible. Add the vanilla essence and the lemon juice and mix well.

Pour the mixture into the prepared crumb-lined tin.

Preheat the oven to 160C and bake the cheesecake for approximately 65 minutes. (1 hour and 5 minutes, in case you think I have made a mistake.) Watch it carefully in the latter stages to ensure that the mixture does not rise too much. If it does, turn down the heat.

Remove the cake from the oven and do not be surprised if it still has a slight wobble. Cool to room temperature and refrigerate overnight, still in the springform pan. To serve, balance the cake on the fingers of your left hand, unclip the pan with your right hand and let the collar of the pan slip down over your left arm. It helps if someone is there to take the cake from you at this stage.

Sprinkle with grated nutmeg and serve with whipped cream.

Lamb and aubergine casserole (aka graveyard stew)

This may be the recipe that started it all, but it has got me into some trouble since. When I first wrote it out, I used the quantities that I would have used once, although perhaps not now. My theory is that if you are going to mess up the kitchen, you might as well make the mess worthwhile. So I would cook for a multitude and freeze for a multitude.

Then Joe and Pearl Saragossi asked me if I had a good lamb casserole recipe. I told them about this one and promised to print out a copy. When I asked if they had enjoyed it, Joe said, “That recipe is for twenty people. Pearl and I eat very little these days.” (You can’t please all of the people all of the time!) Well, I’m not at all sure that four kilograms of lamb, including bones, would have fed twenty people, even with pigeon-sized appetites, but I do take his point. (I have, since, made it to feed twenty people, and the original quantities would not have done!)

I think it was Georgie Lewis who gave it it’s other name, Graveyard Stew. I objected to the ‘stew’ label for a while, then finally gave in to public pressure. If people like it enough to re-name it, why complain? The empty plates certainly resemble a graveyard.

So, here it is, re-hashed.

By now I am sure you are well aware of my views regarding the treatment of aubergines before cooking. Unless the aubergines are old with dark, prominent seeds, they do not need to be soaked in milk or dredged in salt. Buy young aubergine, with smooth, shiny skins and cut them as you are about to use them.

The proportion of leg chops to forequarter and neck chops is not really critical. The leg chops have plenty of meat, the neck chops are full of flavour and the forequarter chops are somewhere between the two.

Oil for cooking

2 – 3 large onions, finely chopped

2 kg lamb leg chops

1 kg lamb forequarter chops

1 kg lamb neck chops

2 tablespoons plain flour

2 medium sized aubergine, young with shiny, unwrinkled skins

½ bottle of Italian pureed tomatoes

Chicken or beef stock, or a combination of the two

3 tablespoons tomato paste

1 tablespoon brown sugar

A dash of red wine vinegar

Salt and freshly ground pepper

Preheat the oven to 180C. Peel and slice one of the aubergines about 1 cm thick. Drizzle a little oil into a baking dish and place aubergine slices into the oil. Spray or drizzle with more oil and bake until slices are tender. Remove from baking dish and drain on absorbent paper.

Repeat with remaining aubergine. When all aubergines are cooked and drained, dice coarsely.

Meanwhile, cut excess fat from chops. Heat oil in a heavy-based frying pan and sauté onion until transparent. Transfer to a heavy-based casserole. Add a little more oil, if necessary, to the frying pan, and brown chops, in batches. Transfer chops to the casserole as they are browned. Add flour, working it down amongst the chops so that the fat on the chops absorbs it and the remainder thickens into the sauce without lumping.

Add coarsely diced aubergine to the casserole with the onion and the chops. Add a little more flour and make sure it is absorbed by the fat in the aubergine, onion and chops.

Add tomato puree, tomato paste, brown sugar, red wine vinegar and enough stock to cover. Season with salt and freshly ground pepper.

Make sure oven is still preheated to 180C and add casserole, covered. Cook for approximately 2 hours or until the lamb is tender. (The neck chops will take the longest to cook.)

Remove from oven, cool and refrigerate overnight. Skim all fat from surface of casserole.

To serve, heat gently until casserole reaches a simmer and meat is heated through.

Before you begin: Flour facts

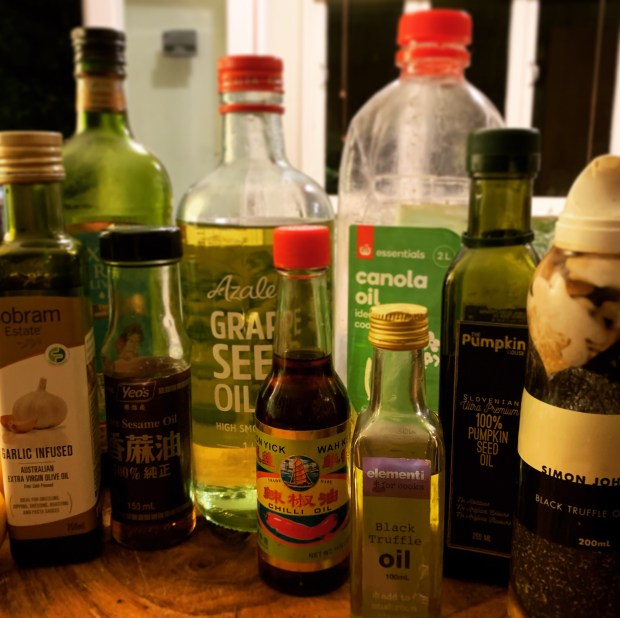
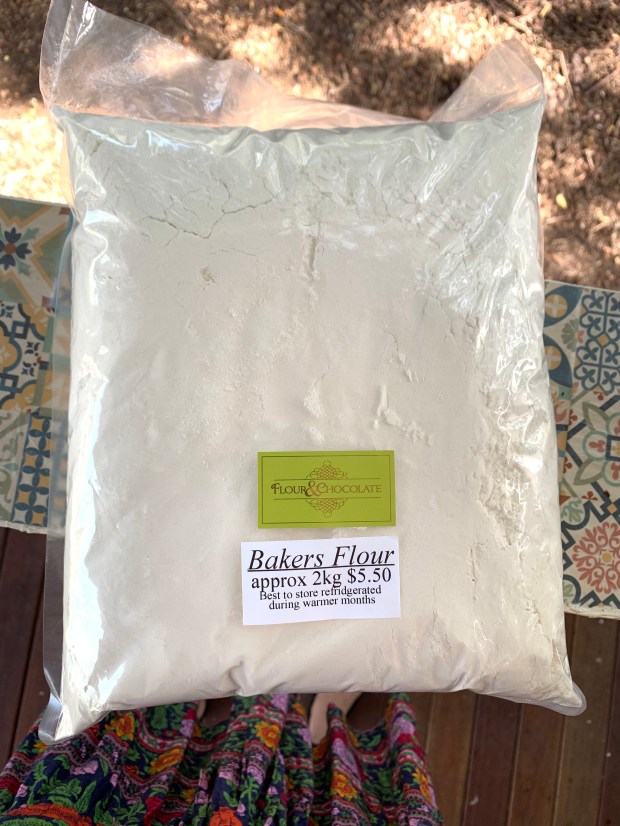
That flours ain’t flours has been forcibly brought home to me recently and in my endeavours to find out more, I have discovered that the mere housewife who does not want to buy her flour in 20kg bags is very poorly catered for, particularly in Queensland.

IMG_2678Flour is the ground meal from wheat and other grains including rye, barley, oats, corn and rice.  All have been used to make bread for thousands of years and until the latter part of the 19th century, all grains were milled between heavy millstones, which ground the whole grain. These days, flour, especially wheat flour, is milled using high-speed metal rollers. These rollers extract the outer husk (bran) of the wheat and the germ (the plant’s embryo), leaving just the central part of the seed, the endosperm. The bran and the germ can be returned to the flour to give wholemeal flour.

White flour is made from the endosperm only and it is this endosperm that contains all the gluten-forming proteins. Flours with different gluten levels are made from different varieties of wheat. Strong plain flour is milled from so-called ‘hard’ wheat varieties with a high gluten level. ‘Soft’ wheat varieties have a low gluten level and the flour milled from them is far more ‘tender’ than that milled from ‘hard’ wheat.

Strong flour is sometimes referred to as baker’s flour or bread flour, although this is not strictly true, as there are stronger flours than that needed to make bread. However, the extra protein is particularly important in bread making. The kneading of the dough develops the gluten network necessary to trap the gas given off by the yeast. The trapped carbon dioxide stretches the gluten fibres further and the dough rises. This gluten web sets during cooking and a firm well-aerated bread is produced. If there is insufficient gluten in the flour, the gluten network cannot be established and the rising does not take place. The extra protein in strong flour also helps the flour absorb more fat and liquid without the mixture ‘splitting’. Strong flour can contain as much as 15% gluten, whereas baker’s flour usually contains around 11 – 12%.

In America soft flour is widely sold as ‘cake flour’. In Australia we are not so lucky. Self-raising flour is (supposedly) soft flour with baking powder (a chemical leaven) added. The baking powder takes the place of the gluten, giving self-raising flour the tender properties of soft flour with the rising properties of strong flour. However there is so little difference between the gluten levels in plain and self-raising flour in Australia there is no point at all in buying self-raising flour.

Plain white flour is sometimes known as ‘all purpose flour’. It is a mixture of hard and soft flours, the proportions in which they are mixed determining the gluten level of the flour. This varies quite significantly from brand to brand. It is a ‘compromise’ flour, being neither really suitable for bread making with too low a gluten level, nor for good cake making with too high a gluten level.

Wholemeal flour, despite common belief, is neither ‘less refined’ nor ‘less processed’ than plain flour. It is processed to white flour and in most cases, the bran only (not the germ) is mixed back into the flour. Similarly, ‘stone ground’ flour (which, I am assured by one of Defiance’s ex-millers, is not, and never has been stone ground) is processed to plain flour and some bran is added. Such flours have more dietary fibre than white flour and are less white in appearance. They are better for you, but ‘less processed’ they are not. Because of the presence of the bran, the gluten content (in grams per 100grams of flour) of such bread is lowered. Breads made with such flours will naturally be heavier.

The most common misconception regarding flour is that most flour is bleached. Bleaching is a process in which a chlorine gas is passed through the flour at some stage of the milling process to whiten it. Most, if not all flour sold in Australia is unbleached. One home economist from Allied Defiance even went so far as to tell me it was illegal to bleach flour and has been for thirty years. Some mills do still bleach flour but it appears that they do this largely for export to Asia where snow-white flour is considered superior.

No flour mill in Australia produces bleached flour for the domestic supermarket market, so if you are buying flour from the local shop you can be confident it is unbleached.  White flour actually whitens naturally with age.

So can you get away with just one ‘all purpose’ flour in your pantry? Well, in theory, yes, provided you have the necessary additives. If you are making bread or pizzas you will need gluten flour to increase the gluten content of plain flour (of which more later). If you want to make cakes or scones, you can convert plain flour to self-raising flour by adding baking powder. In fact, if the baking powder is added just before baking it is more effective and the cream of tartar is less likely to leave a bitter taste in the flour as it can, especially if the flour is old.

Can you get away with just baker’s flour in your pantry? Again, in theory, yes. Maggie Beer seems to manage it brilliantly, though I am told that unless she has an extremely deft touch with her blender, her cakes may be just a tiny bit heavier than necessary, and even a little chewy.

Alternatively, you can convert plain flour to baker’s flour by adding 3 teaspoons of gluten flour to every 500g of plain flour. (Or 1 teaspoon of gluten flour to 1 cup of plain flour.) Note that gluten flour is NOT baker’s flour. It is gluten extracted from the flour during the milling process. It has a protein content of 69.5g per 100g of flour. (Compare this with 12g per 100g flour for Defiance brand baker’s flour.) Gluten flour is sometimes available in the health food section of supermarkets and usually from health food shops.

If you wish to convert baker’s flour to plain flour, you simply use less. For every cup of plain flour you wish to use, fill a cup with baker’s flour and then remove 1 tablespoon. Proceed as if you were using plain flour.

To convert plain flour to self-raising flour, add 4 level teaspoons (a teaspoon measure is more accurate than a teaspoon) to every 250g of plain flour and sift together twice to ensure they are blended.

As for me…   Well, I suppose I will continue to buy 5kg bags of baker’s flour just for making pizzas and souffles. Who knows, perhaps one day I will make bread? I will continue to have a jar of gluten flour in the cupboard just in case my baker’s flour has too many moths in it to be usable. I will continue to buy Defiance brand plain flour out of some misplaced loyalty to Defiance flour which now belongs to a multinational company and because it has a nice middle-of-the-road gluten content of 10.8%.

I will not be buying self-raising flour, but will now add baking powder to plain flour when I want to make a cake or bake scones. I may even buy some White Wings brand plain flour because it has a gluten content of only 9.6% and therefore should be better for cakes than Defiance plain flour.

Oh! I nearly forgot the wholemeal flour which I use for some biscuits, the oatmeal and the fine oatmeal, the ground rice and rice flour, the Italian ground rice and the cornflour for Chinese cooking and of course the Fielder’s wheaten cornflour for other things. Perhaps I should get some rye flour?

………

It is now late 2008, and I am very pleased to say that a new flour brand has recently appeared on the shelves of some of our bigger supermarkets. This is Anchor brand “Lighthouse” special purpose flour. There are two plain flours: Cake, Biscuit and Pastry flour with a gluten content of 8.5g per 100g, and Bread and Pizza flour with a gluten content of 11.0g per 100g. Whilst the latter is not quite as strong as Defiance’s baker’s flour at 12.0g per 100g, it does come in 1kg packs, not 5kg ones like Defiance’s. (Even stored in plastic tubs, my baker’s flour always ended up full of moths before I could get even half way through it.)  However, I have already made twice-cooked gruyere cheese soufflés with the Anchor Bread and Pizza flour, and they were wonderful and didn’t even threaten to split!

Even better still, Anchor brand “Lighthouse” self raising flour has a gluten content of 8.2g per 100g making it a true “cake’ flour. (Compare this with both Defiance and White Wings self raising flours at 9.5g per 100g.) Needless to say, I am changing my allegiance from Defiance to Anchor, (and go back to using self raising flour), even if it means that I have to go to Coles or Woolworths to get them!

But, do I use soft or strong plain flour for gravy, for fish and other batters, or do I continue to buy a middle of the road plain flour for just these everyday eventualities? Oh dear!

Soft poached eggs

IMG_0430

“Good poached eggs are one of the joys of this life, but a properly poached egg is a rare thing. Even after thirty-something years of marriage, I cannot get used to eggs poached in an egg poacher. Nanya poached eggs to perfection, and the only other person I have known since to do this, was Peter Maloney. Not to mention the fact that eggs cooked this way do not leave that impossible-to-get-off albumen deposit on the egg poacher.”

I wrote the above about six years ago, and despite thinking I had the art of egg poaching down to a fine art, I still didn’t really. I have bought egg timers, experimented with eggs poached in cling wrap (!) and usually resorted to the good old egg poacher.

Yesterday, however, Dad returned from a trip to the Whitsundays fishing on South Pacific 11 with Ron Jenyns, Bobby Douglas and numerous other reprobates. Ron’s resident chef, Brett, served perfect soft poached eggs to at least twelve people for breakfast every morning. When everybody except Bobby and Dad went collecting those horrible black-lip oysters that grow in the Whitsundays, they cornered Brett and asked him to teach them to poach the perfect egg. This morning I was presented with two on toast. And they were perfect.   

Brett’s theory is that it is the vinegar that is added to the poaching water that sets the albumen (the white).  The problem with most people is that they simply don’t add enough vinegar so the white floats around in a most unappetizing fashion. He uses 1 part vinegar to 15 parts water. If you think that is a lot, he says that most restaurants use 1 part vinegar to 7 parts water. Use the cheapest vinegar you can buy. The one he uses in the one I use for cleaning windows.

Heat a large saucepan (forget the frying pan – you should have at least 10 cm of water to poach the eggs in. Work out just how much water you have used and do your sums. You’ll soon get used to using the right amount of vinegar.

Bring the water/vinegar to the boil. Break the eggs straight into the water (none of this ‘break it into a cup and slide it into the water first’!) The eggs will sink like stones so slide a spoon under each egg to ensure it doesn’t stick to the bottom. Then turn down the heat until the water is barely moving.

Once the eggs are in and not sticking, increase the heat to a gentle simmer. When they rise to the surface of the water, they are done and should be removed immediately to drain.

Note:  Eggs can be poached up to 24 hours in advance. Slip eggs into a bowl of iced water to cool quickly and not cook further.  Cover the bowl and store in the refrigerator. Reheat eggs by carefully lifting them from the water and sliding them into a pot of gently simmering water. Allow 1 minute to heat through, remove and drain well on absorbent paper.

As I sit here….

As I sit here thinking about recipes and food generally, all sorts of things keep popping into my head. I think, ‘I wonder if they realise that?’  So I thought that I had better start writing them down. No doubt there are dozens more that I haven’t thought of as well.

Before you begin – Oils

Oil. Think carefully about which oil to use in a recipe. In 1997, canola oil was considered to be the best oil to use health-wise. Cooking oils all contain saturated fats, mono-unsaturated fats and poly – unsaturated fats in varying proportions. Canola oil (and Grapeseed oil) has the biggest proportion of ‘good’ fats and the lowest proportion of ‘bad’ fats. In addition it also contains Omega 3 fatty acids, usually found in fish. These Omega 3 acids prevent the blood from clotting and are therefore considered very important in preventing heart disease. They are also important in reducing inflammation in some kinds of arthritis, in preventing asthma, in the development of the brain and in maintaining a healthy retina of the eye.

Less than a year later, some experts were saying that olive oil was the healthiest way to cook. To hedge my bets, I tend to cook with both…canola or grapseed oil for general cooking, seafood and Asian food, olive oil for all Mediterranean-style cooking. I still prefer the flavour (or rather the lack of it) of grape seed oil for fish cooking, and because grape seed oil rates fairly highly on the scale of ‘good oils’, I will still use it for cooking fish.

Ironically, however, in 2004 it was announced that vegetable oils, and in particular, canola oil was responsible for causing macular degeneration of the eye and was causing blindness in quite young people. So you can use butter and die of heart disease or use vegetable oil and go blind!

Once upon a time, I used peanut oil almost exclusively, and always for Asian cooking. These days I won’t even have it in the pantry. The incidence of peanut allergies has risen so dramatically over the last few decades that it is just not worth it.

Even the tiniest amount of peanut oil served to a person with a peanut allergy could result in death and I am just not prepared to take that risk.

I still use butter for some cooking. I cannot make a bechamel sauce without it, try as I might. I use butter for cooking liver as butter gives liver a better colour.

Just a word about olive oil. The flavour of olive oil is completely foreign to all Asian countries with the exception of Macau. (Macanese cuisine is a unique blend of Chinese and Portuguese cooking.) Most Asian cuisines use peanut (but see above) or sunflower oil. Canola oil is fine too. In Asian cooking the oil is simply a cooking medium; in Mediterranean cooking the flavour of the olive oil is important. Never use olive oil when preparing an Asian dish.

Olive oil is made by pressing the olives a number of times. The best oil comes from the first pressing. This is called ‘Extra Virgin’, and the oil produced is usually a fairly deep green. The second pressing produces ‘Virgin’ Olive oil, which is slightly lighter in colour. The third produces ‘Classic’ or ‘Classico’, which is usually a fairly deep gold in colour. Then come the final pressings producing ‘Light’ and ‘Extra Light’ Olive Oil. These are generally despised by the true Italian and Provencal cooks, but for our tastes, they are less overpowering than the earlier pressings. All are pure oil and all contain the same amount of fat. It is a flavour choice, not a health choice. Extra virgin olive oil contains the same amount of fat as extra light olive oil.

It is a myth that adding oil to the water when cooking pasta stops the pasta from sticking. All it does is inhibit the ability of the pasta sauce from adhering to the pasta.